Disclaimer: Some pages on this site may include an affiliate link. This does not effect our editorial in any way.
Setting up a virtual private network (VPN) on your router rather than individually on each device has numerous advantages. You can connect as many devices as your router can handle, and any device connected to it will be automatically protected. However, the instructions for VPN installation vary depending on the router model, which often leads to confusion. If you’re wondering how to install a VPN on a router, we’re here to help. This guide will explain how to install a VPN on Xfinity, AT&T, TP-Link, Netgear, Asus, Belkin, and Cisco routers. Read on to start browsing without limits.
How to Install a VPN on an Xfinity Router
Installing a VPN on Xfinity routers is tricky because most VPN providers don’t support them. You’ll need to purchase another router, preferably Asus, Netgear, Linksys, or TP-Link, and use your Xfinity router as a modem in the Bridge Mode. You can find a list of compatible routers here.
Once you have the second router box, follow the steps below to enable the Bridge Mode on your Xfinity router:
- On a device connected to your Xfinity router, visit the Xfinity Admin Tool page.
- Sign up with the default username (admin) and password (password) unless you’ve changed the login details previously.

- Click “Gateway” located in the left sidebar, then “At a Glance.”

- Select “Enable” next to “Bridge mode.”
- When you see a warning message, click “Ok” to proceed.


Note: In Bridge Mode, your Xfinity router won’t provide Wi-Fi. You’ll also lose the xFi functionality.
Once your Xfinity router is in the Bridge Mode, connect it to the second router using an Ethernet cable. Next, find a VPN compatible with your second router and purchase a subscription. The setup instructions may vary depending on the VPN provider and your second router’s model. You can find detailed instructions in your router’s user manual or your VPN provider’s website. Here are the general steps to follow:
- Visit ExpressVPN and sign up for an account.
- Click on the Router option.
- Find your VPN’s firmware file suitable for your router model and download it.
- Visit your router’s Admin Tool page and log in.
- Navigate to the firmware update menu – usually in connectivity settings – and upload the VPN firmware file.
- Wait until the firmware installs. You may have to restart your router afterward.
- Follow the instructions provided on your router’s Admin Tool page to set up a VPN. In most cases, you’ll need to enter an activation code sent by the VPN provider by email.
- Once the VPN is set up, go to your VPN service dashboard, select the desired server location, and enable the connection.

How to Install a VPN on AT&T Router
AT&T routers don’t support internal VPN encrypting. This means that you’ll have to connect every device to a VPN individually rather than run the VPN on your router. Depending on the VPN provider, the instructions may vary. Here’s an example of setting up a VPN connection on a Windows computer using ExpressVPN:
- Purchase a suitable subscription via ExpressVPN’s official site.
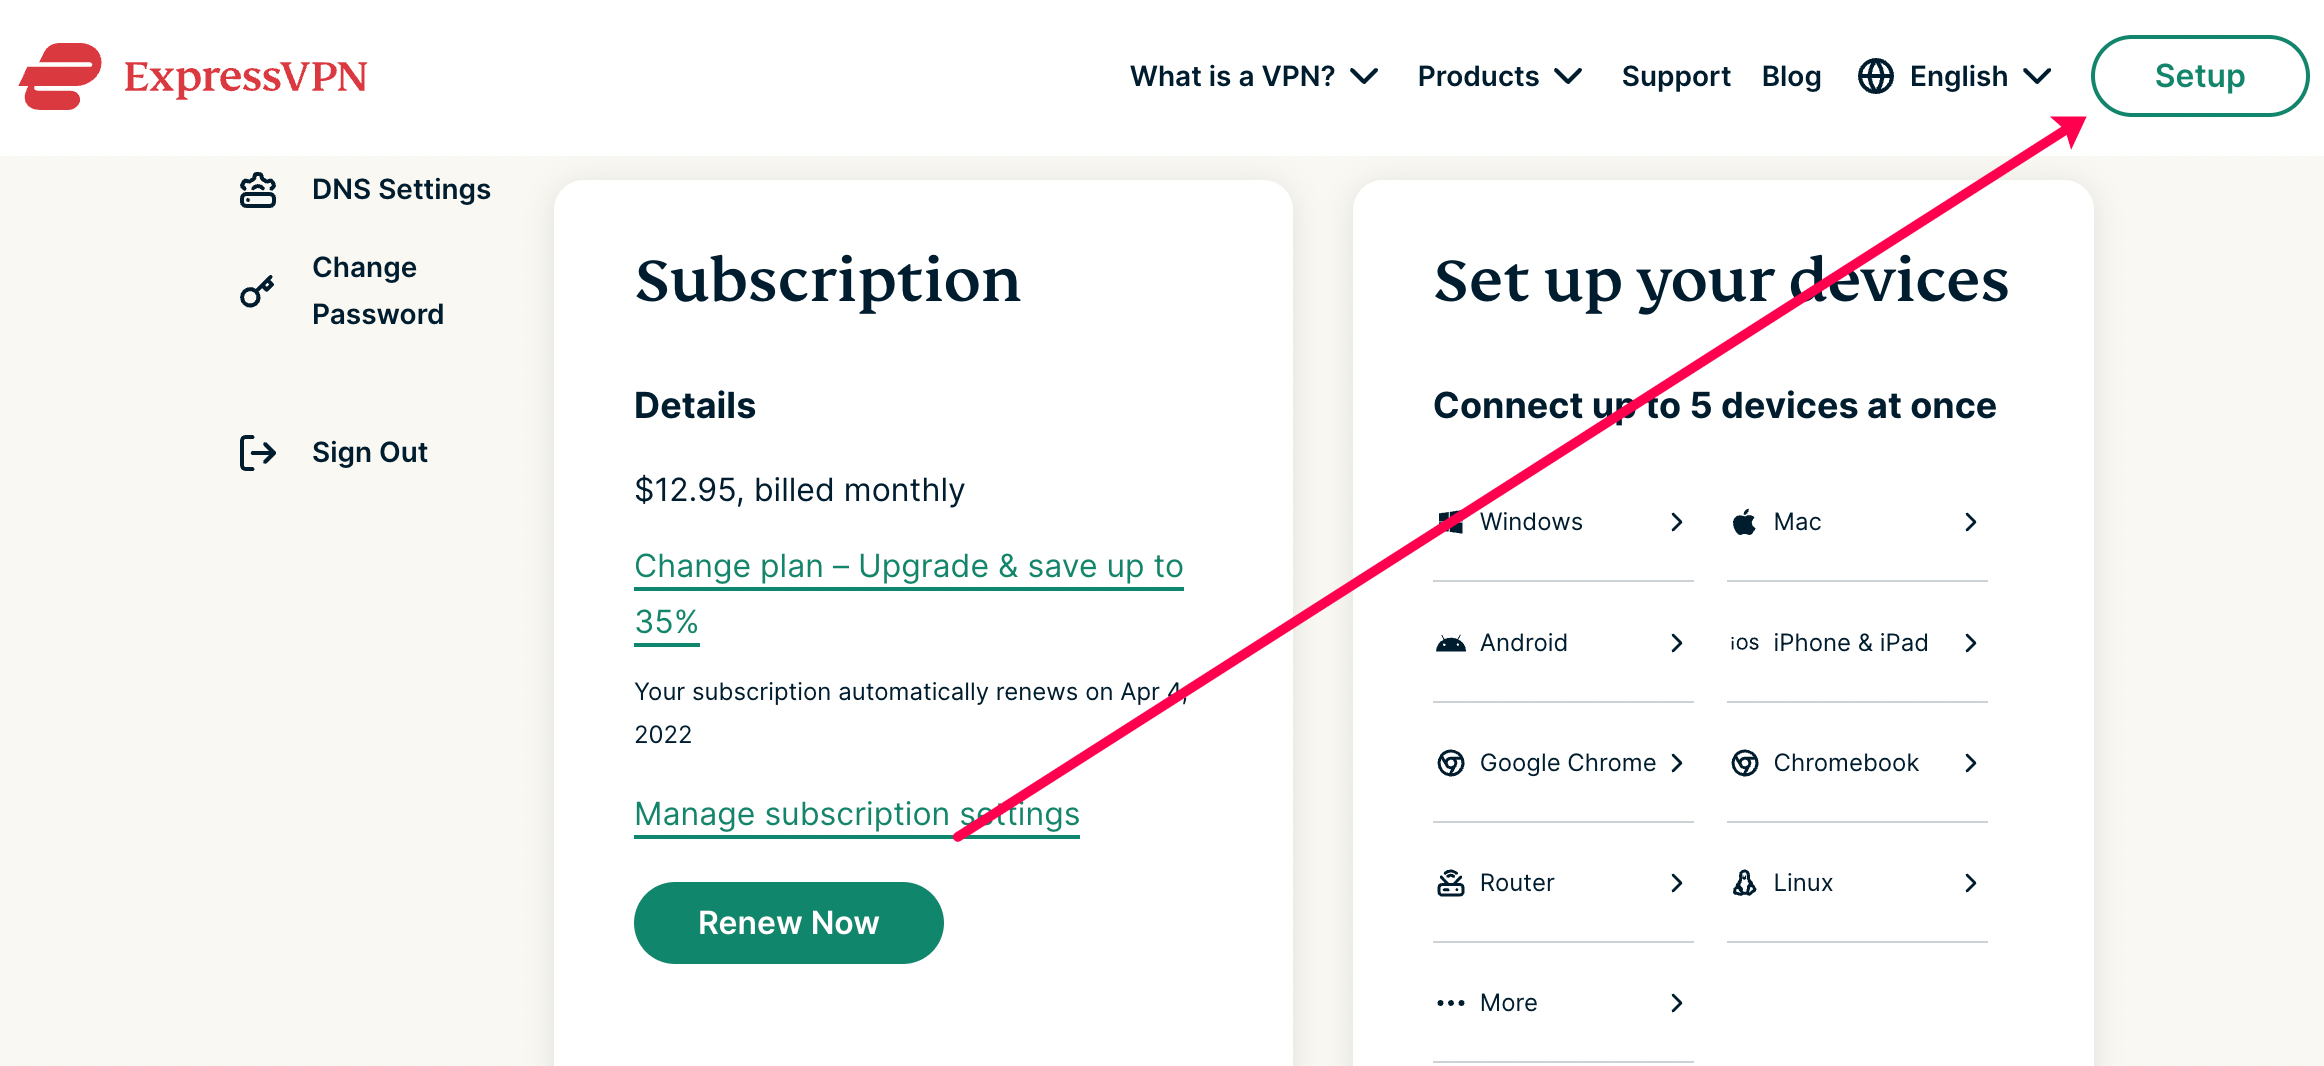
- Head to the ExpressVPN dashboard and sign in.
- Click on your Account page and click on Setup.
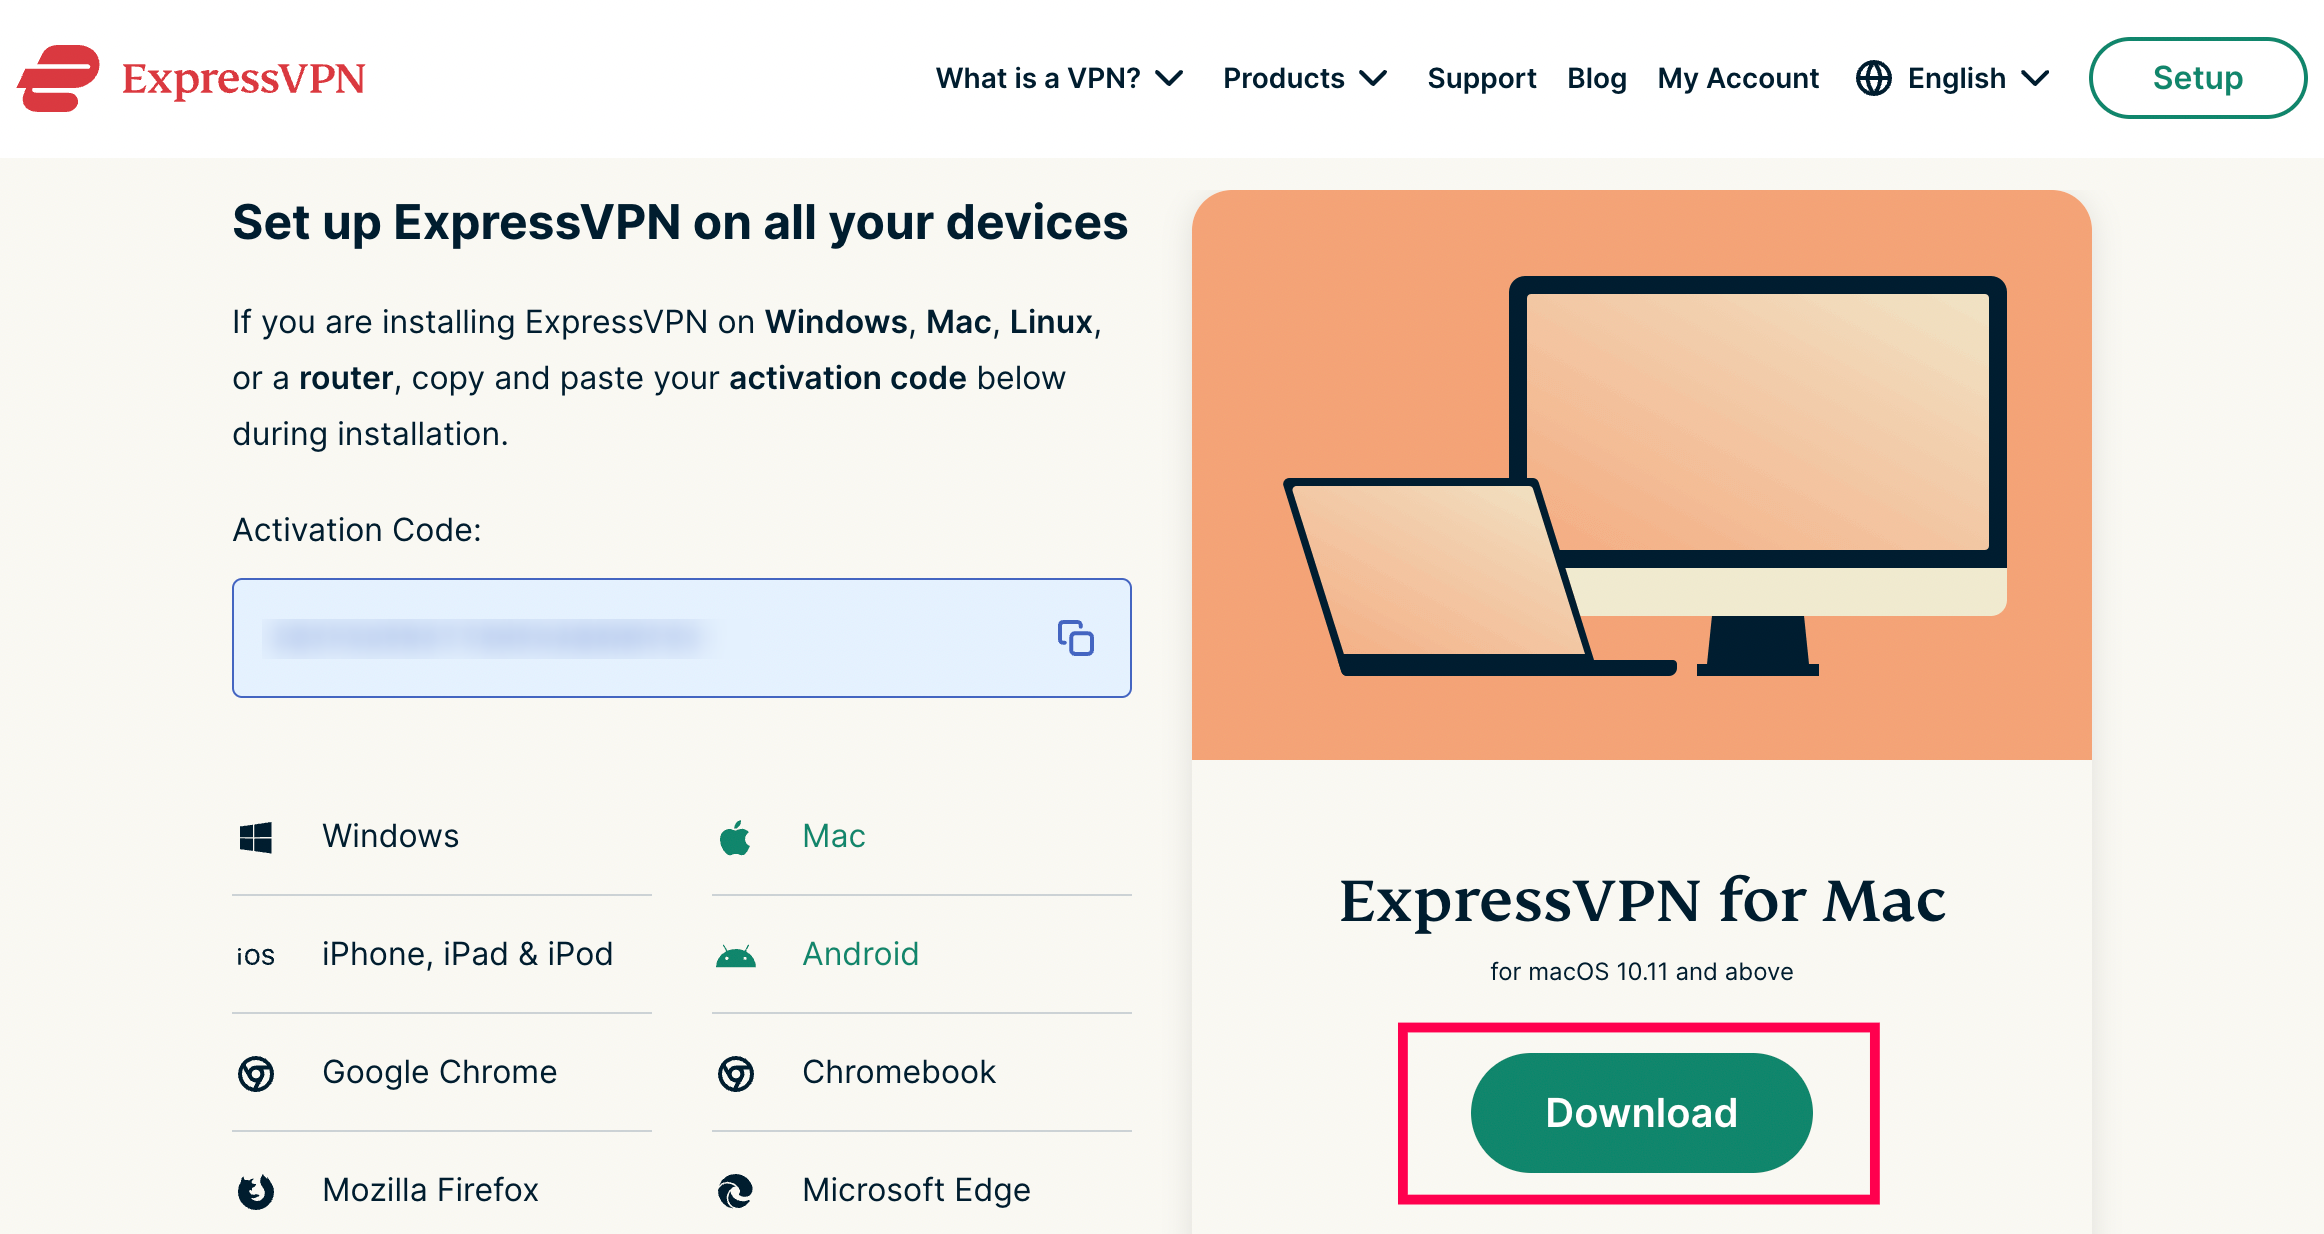
- Click the ExpressVPN app “Download” button and copy the activation code displayed on the same page. Or, select one of the other device options to receive an activation code.
- Find the app installation file in your “Downloads” folder and double-click it.
- Follow on-screen instructions to install the app. Enter your activation code when prompted.
- Select your preferences.
- Once the app is installed, launch it and expand the dropdown menu on the main page.
- Select your desired server location.
- Click the large power button to connect to the chosen server.


Note: If you’re looking for a VPN router, you’ll need to purchase a router of a different brand.
How to Install a VPN on a TP-Link Router
Most TP-Link routers support VPN encryption. Depending on your chosen VPN provider, the setup instructions may vary slightly. One of the most popular VPNs on the market is ExpressVPN. So, we’ll provide instructions for setting up ExpressVPN on your TP-Link router as an example. Follow the steps below:
- Purchase a preferred subscription plan via ExpressVPN’s official site.
- Sign in to your ExpressVPN account and enter the verification code you’ve received by email when registering.
- You’ll be redirected to the manual setup page. Under “Manual Configuration,” select “L2TP/IPsec.”
- You’ll see your IP address and password. Keep this browser page open.
- Log in to your router’s Admin panel with default credentials (username “admin,” password “password”) or with credentials you’ve set previously.
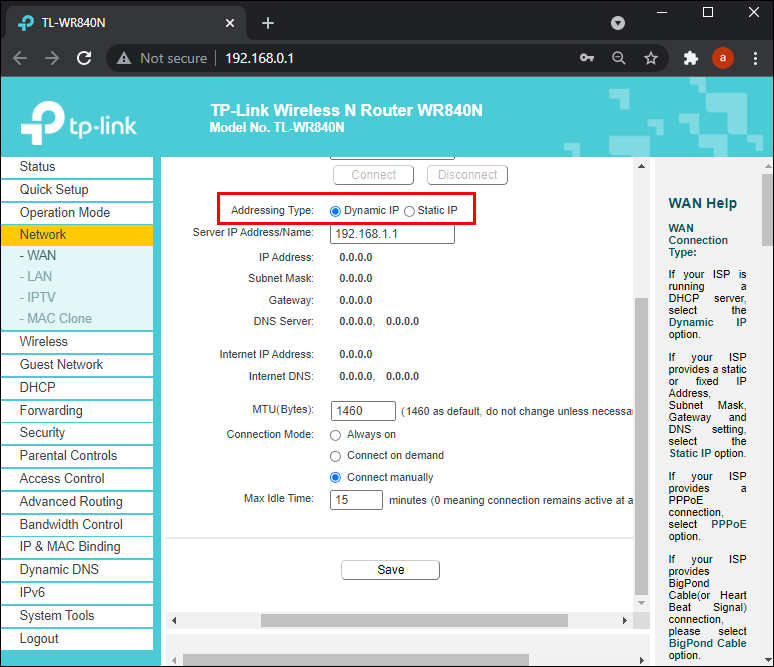
- Click “Advanced,” then “Network,” and “Internet.”
- Under “Internet Connection Type,” select “L2TP.”
- Enter your IP address and password shown on the ExpressVPN setup page (step 4).
- Select “Dynamic IP” next to “Secondary Connection.”
- Select “Manually” next to “Connection Mode.”
- Set “Max Idle Time” to “0” and click “Connect,” then “Save.”
- Head to the ExpressVPN dashboard and select the desired server location. Click the large power button to connect.


How to Install a VPN on a Netgear Router
All Netgear routers support a VPN, so setting one up is pretty simple. We’ll provide setup instructions on the ExpressVPN example, though steps may vary slightly depending on the VPN provider. Follow the instructions below:
- Visit the ExpressVPN official website and purchase the desired subscription.
- Head to the setup page and select your router model from the dropdown menu. Then, click “Download Firmware.”
- You’ll be redirected to a page showing an activation code. Copy it or keep the page open.
- Head to your router’s admin panel and log in. By default, the username is “admin,” and the password is “password.”
- Navigate to the “Advanced” tab and click “Administration,” then “Router Update.”
- Click “Browse” and select the firmware file you’ve downloaded in step 2. Then, click “Upload.”
- Wait for your router to restart.
- Head to the ExpressVPN dashboard and expand the dropdown menu under the large power button.
- Select the desired server location and click the power button to connect.
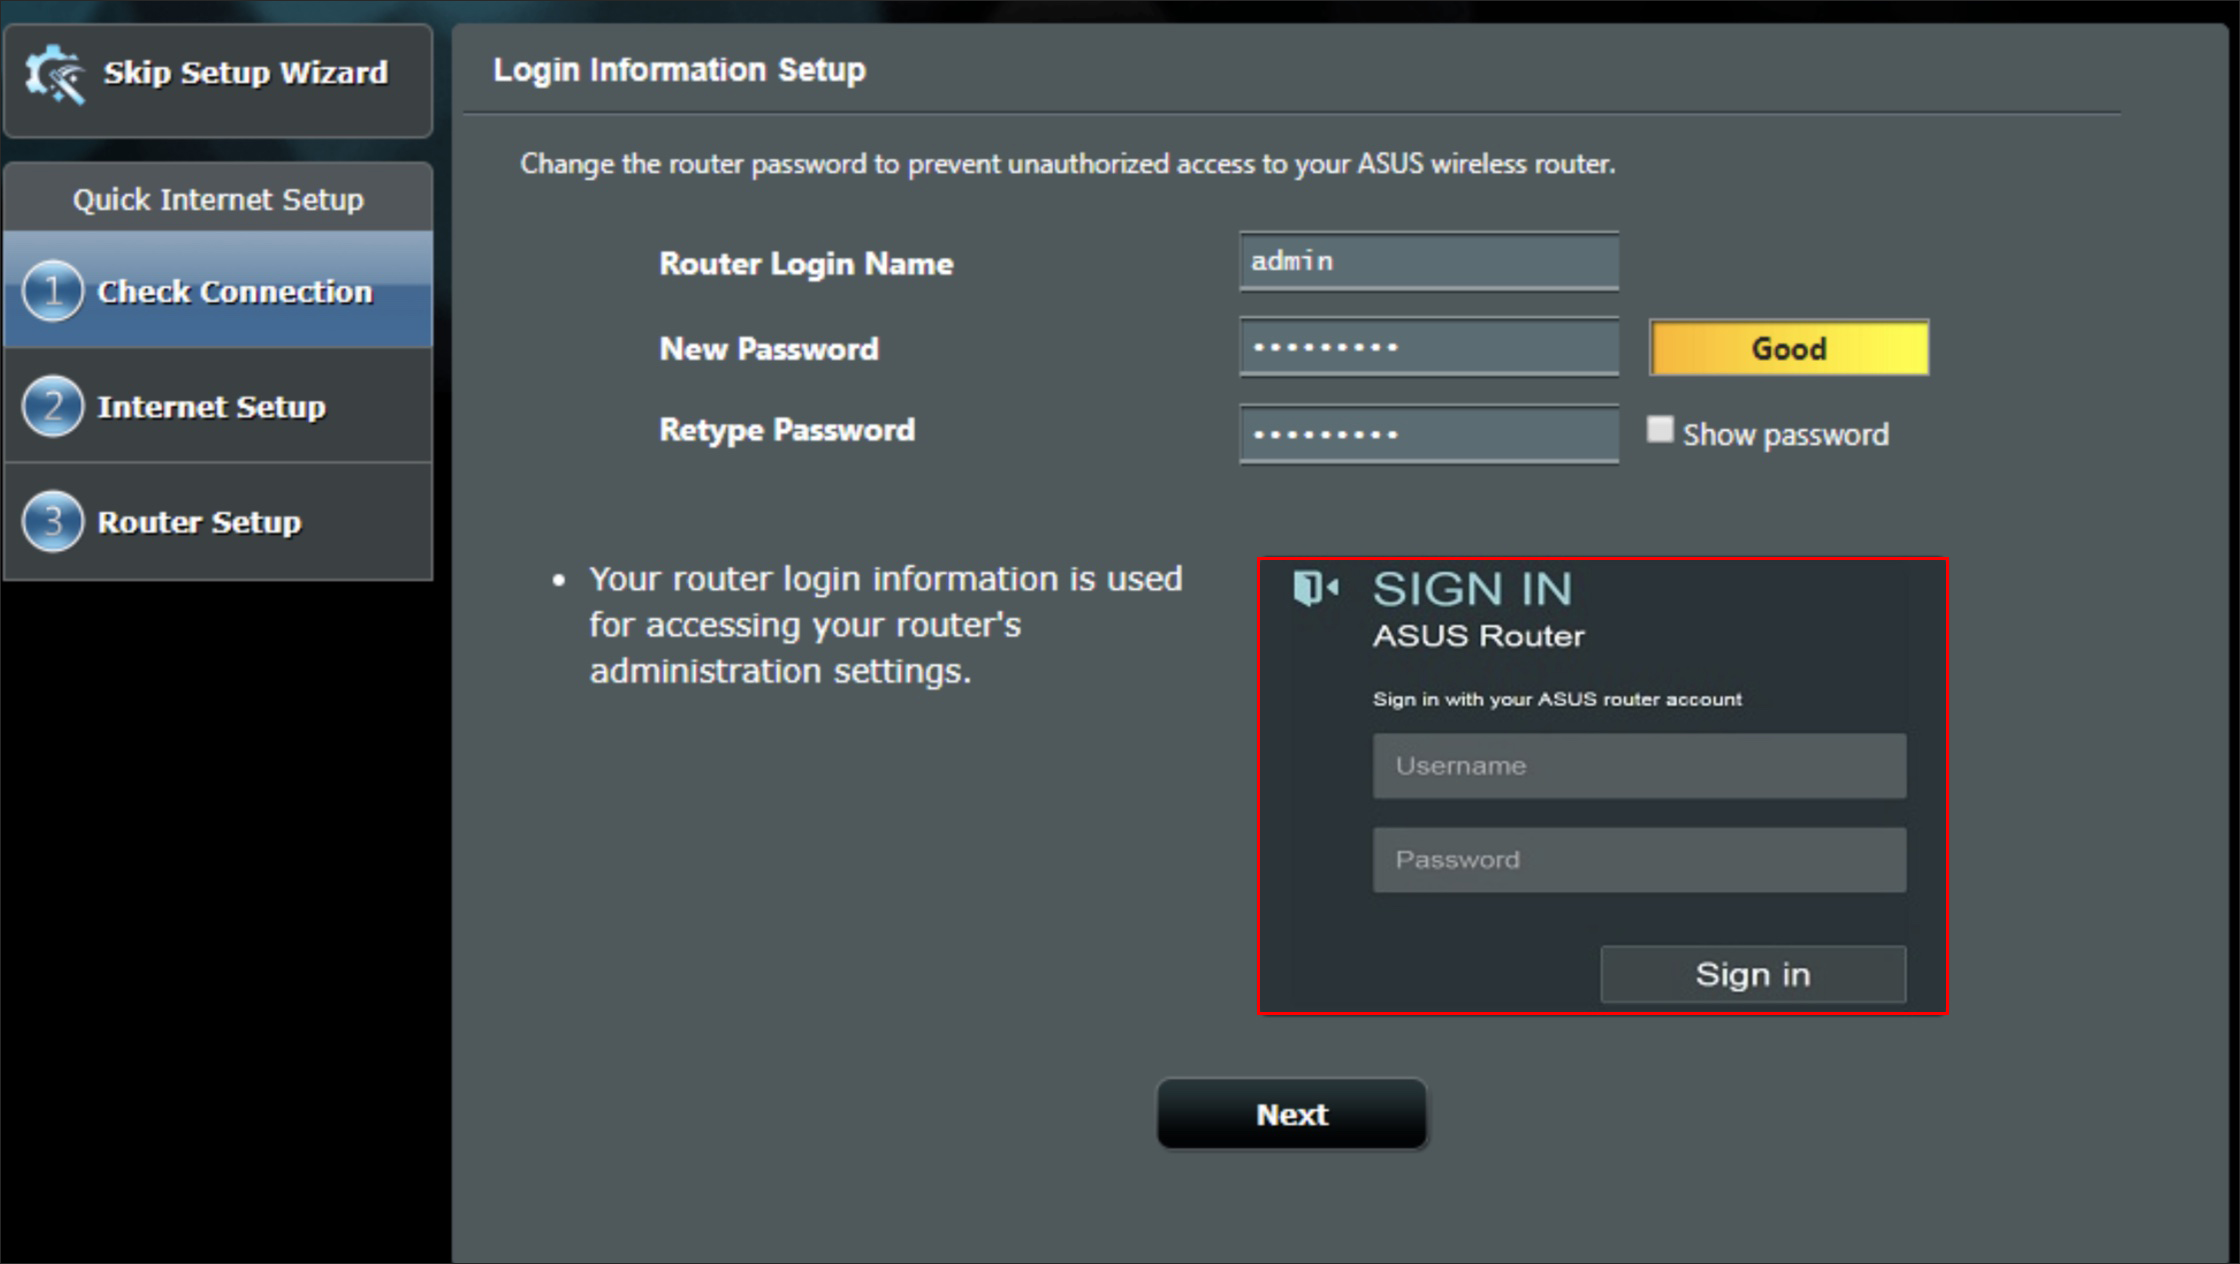
How to Install a VPN on an Asus Router
Asus routers come with VPN encryption support. Here’s how to set up a VPN on your router on the ExpressVPN example:
- Purchase a subscription via ExpressVPN’s official site.
- Head to the VPN setup page and sign in. Then, paste a verification code sent to your email.
- You’ll see your username, password, and activation code. Keep this browser page open.
- Expand the menu under “America” or “Europe” depending on your location and download the configuration file.
- Log in to your Asus router’s Admin panel. By default, the username is “admin,” and the password is “admin.”
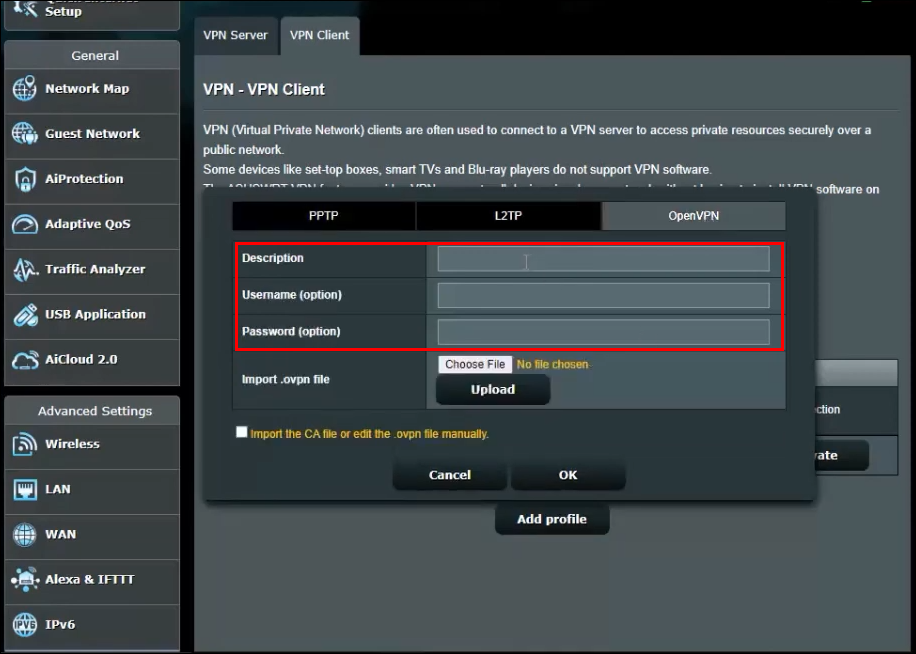
- Select “VPN” from the left sidebar.
- Click “VPN Client,” then “Add Profile.”
- Open the page with ExpressVPN login details. Copy the username and password and paste them into the dedicated fields on the Asus Admin page.
- Click “Choose File” next to “Import .ovpn file” and select the configuration file you’ve downloaded in step 4. Click “Upload,” then “Ok.”
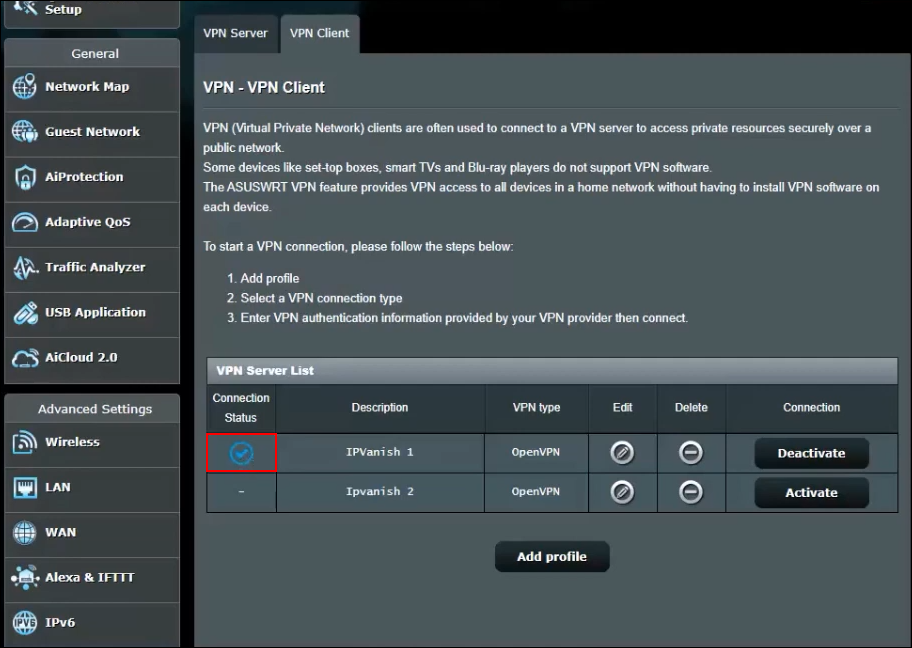
- Click “Activate.” If the activation is successful, you will see a tick icon under “Connection Status.”
- Head to ExpressVPN dashboard, select the desired server location and connect to it.


How to Install a VPN on a Belkin Router
Belkin routers can be connected to a VPN using a PPTP protocol. Here’s how to enable it:
- Enter “192.168.2.1” into your browser’s address line to open the Belkin Admin panel login page.
- Enter the default credentials to sign in: username “Belkinxxxxx,” password “Belkinxxxxx_5GHz,” where “xxxxx” stands for the last five digits of your router’s serial number.
- Click “Configuration,” then “Security.”
- Click “VPN Passthrough.”
- Tick the checkbox next to “PPTP Passthrough” to enable it. Then, click “Apply.”
The next steps may differ depending on your chosen VPN provider. Bear in mind that before purchasing a subscription, you should ensure the VPN provider supports your router model. We use ExpressVPN because we have tested with every router brand on this page and confirmed successful connections. Afterward, follow the instructions below:
- Click “Internet” in the left sidebar on the Belkin Admin dashboard, then navigate to the “PPTP” tab.
- Under “PPTP Settings,” enter the username and password you use to log in to your VPN account.
- Enter your PPTP server address into the “Service IP Address” field. You can find this on your ExpressVPN dashboard.
- Set the “Connection ID” to “0,” “MTU” to “1400,” and “Type” to “Keep Connection.”
- Click “Apply.”
- Head to your VPN dashboard and connect to the desired server location.
How to Install a VPN on a Cisco Router
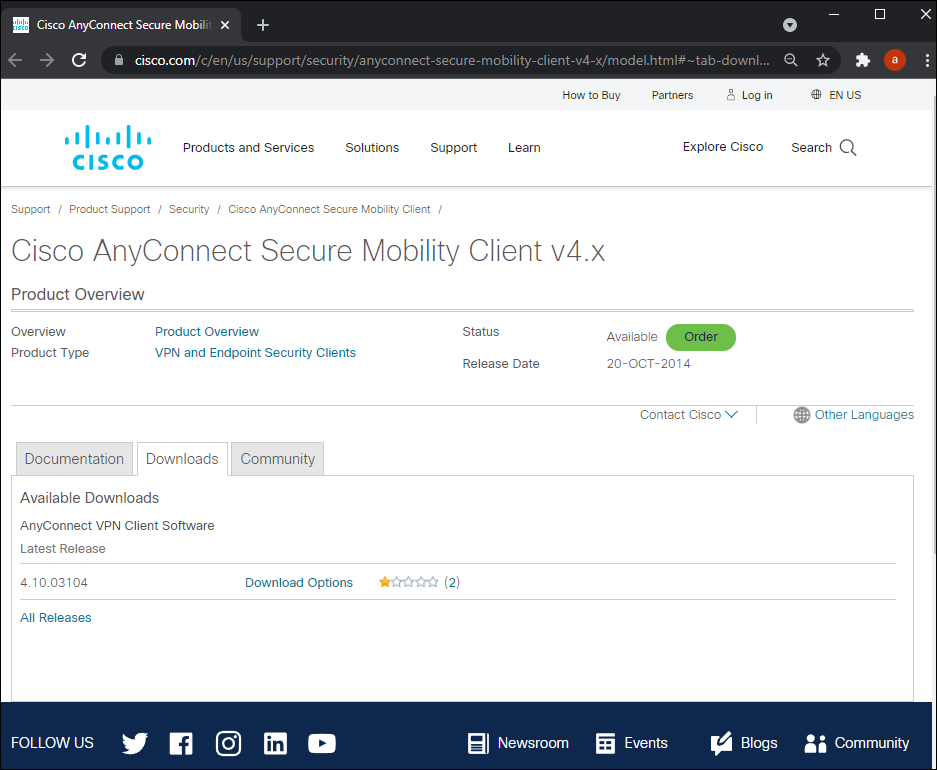
Cisco is one of the best-known names in institution networking, including businesses and educational facilities. To set up a VPN on your Cisco router, you’ll first need to install a VPN client. Here’s how to do that on the native Cisco AnyConnect VPN client example:
- Download the Cisco AnyConnect VPN client following this link.
- Find the “InstallAnyConnect.exe” file on your device and follow on-screen instructions to install it.
- Click “Finish” once the installation is complete.
Once the installation is complete, you can launch the VPN client and log in with credentials provided by your employer or college. On the main dashboard, you&r
o;ll see a “Connect” button. Click it to enable the VPN connection.
Frequently Asked Questions
Here are the answers to more of your questions about installing a VPN on a router.
Will my ISP know that I’m using a VPN?
One of the more important aspects of using a VPN is hiding your online activity from your ISP. Fortunately, VPNs are completely legal in the United States, and your ISP doesn’t receive any alerts that you’ve connected to one of the servers.
But, your ISP may recognize that one of the servers you’ve connected to is a VPN server. Although, even if the internet provider knows you’re connected to a VPN, they aren’t likely to take any action against you.
What is the difference between a VPN and a Proxy server?
If ultimate privacy is your goal, you may wonder why it’s better to use a VPN over a proxy. Proxies are great, but they only mask your IP address for the application you’re using it for. It won’t hide any data from your ISP or work on other applications.
A VPN, on the other hand, changes the IP address for your entire network. For example, if you set up your VPN on your PC, all activity performed on your PC is masked.
How do I know if my VPN is working?
After you’ve set up your router on your VPN, you’ll want to make sure that it is working.
First, check your IP address. You can find this by Googling ‘What is my IP address?’
Next, activate your VPN.
Finally, Google ‘What is my IP address?’ again. If the IP address is the same, you’ll need to revisit the steps above to ensure everything is set up properly.
Final Thoughts on How to Install a VPN on a Router
Hopefully, our guide has helped you set up a VPN on your router. Instructions for some routers are very straightforward, whereas others can be somewhat confusing. If you aren’t particularly tech-savvy, don’t hesitate to contact your internet provider for help.
What’s your VPN provider choice, and why? Share in the comments section below.
Disclaimer: Some pages on this site may include an affiliate link. This does not effect our editorial in any way.


